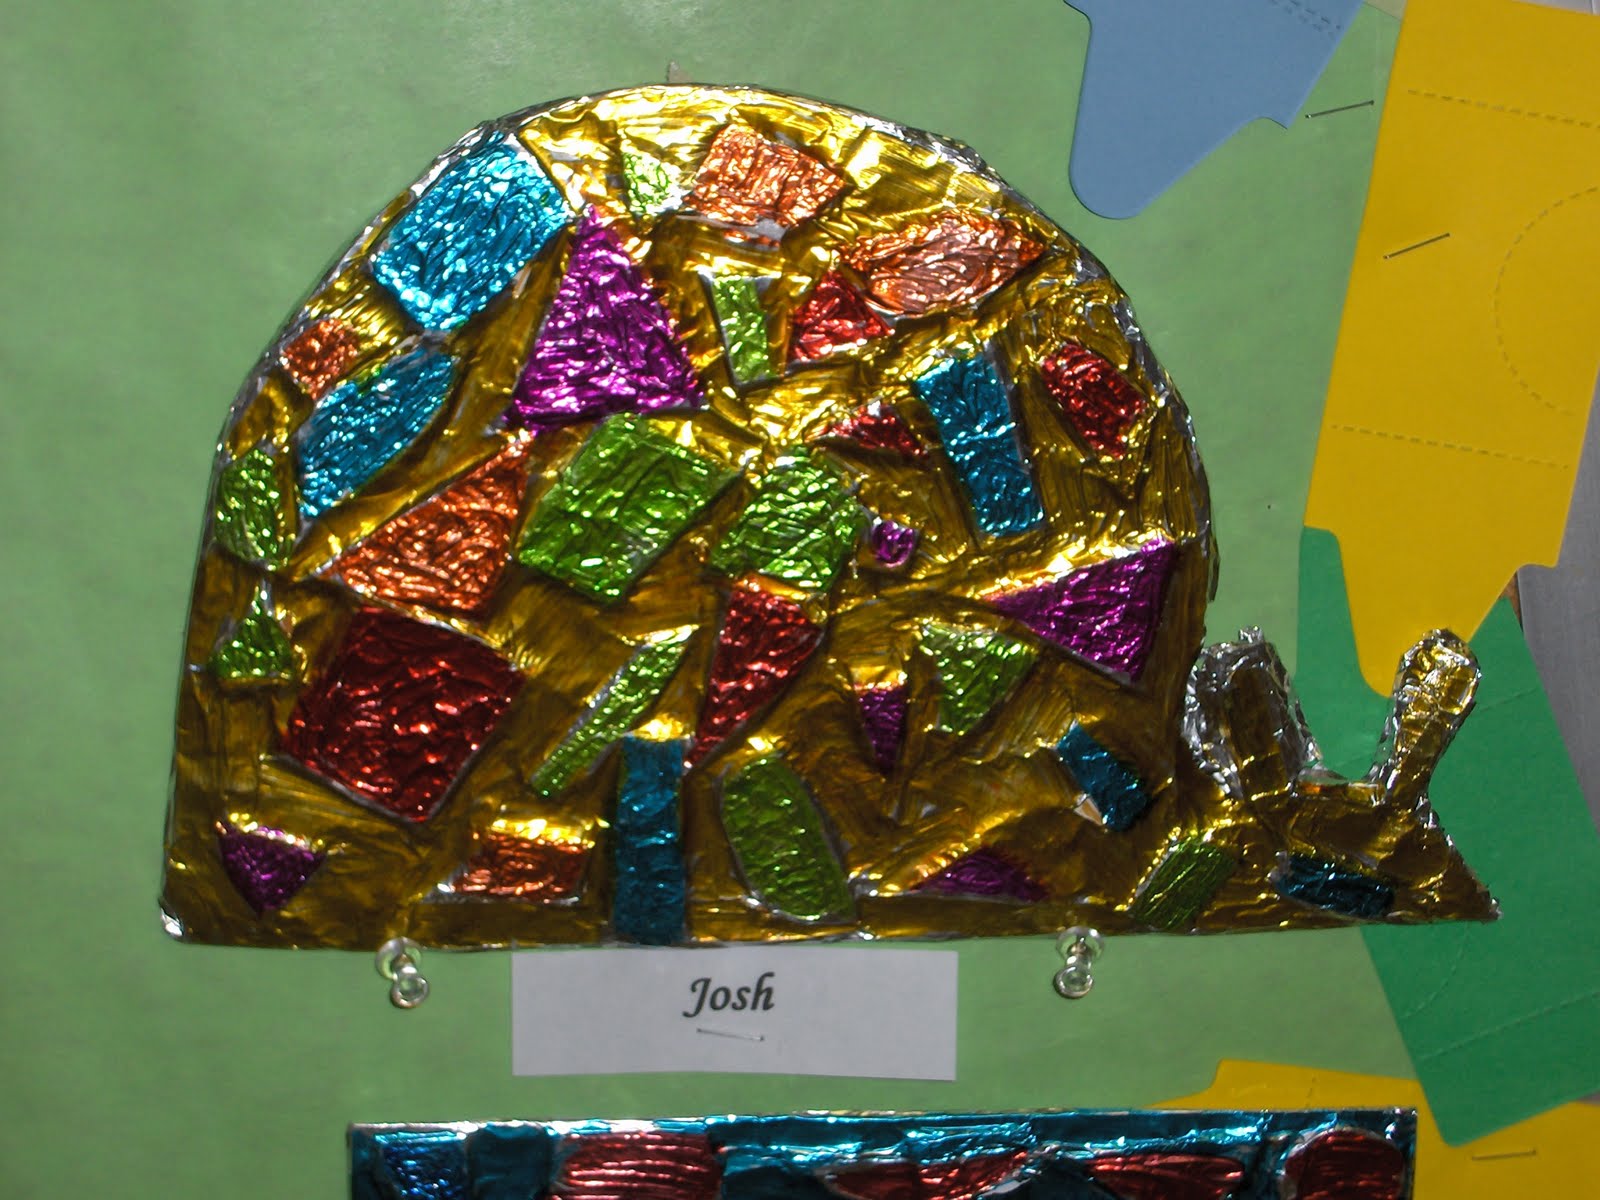
Sunday, October 31, 2010


Metal Tooling

I love these! I got this out of Dynamic Art Projects for Children-Fantastic book, if you are in the market for new books. Fifth and sixth grade students had a social studies unit on Mexico, so we talked about the arts of Mexico. Students chose and animal and made several sketches of the animal. I chose one, and they enlarged in on 12x18 paper. They cut the animal out of the paper then they cut up styrofoam plates and glued the pieces down to form patterns and designs on the animal. I had old cardboard boxed stockpiled and I glued the paper animal with styrofoam pieces to the cardboard. This took forever, but I cut all of the animals out of the cardboard, I just was not comfortable with kids using razer blades. I am not a fan of blood. We covered the animals in aluminum foil and then the kids colored them with Sharpie markers. They were beautiful. I had parents tell me that they were making these at home as well.

Op Art Spheres


I have seen this lesson everywhere on blogs, so thank you to all of you! I like this lesson as it is a great sub lesson. We discuss optical illusions and look at several examples, the kids love them! Then we draw a circle in the middle of the paper. I show students how to make the lines curve with the circle. I give students a ruler and they draw the grid in the background. We talk about contrasting colors, and the kids are off! When the students are finished coloring, we take vine charcoal and add a shadow to the sphere. I usually mount these on construction paper to make them look finished.

Tuesday, October 26, 2010

Spooky Houses


I got this idea from Arts and Activities magazine from October 2009. One of the standards for 5th grade math is that students will know the difference between 2-D and 3-D. How perfectly does that fit into art? We drew houses first, studying architecture. I collected cardboard for a few weeks and cut it into all different shapes and sizes. Students were given a base piece, and I let them build from there. I have several low temp hot glue guns, so students used those to construct the houses. Students had the option of making a house that was not spooky, as not everyone celebrates Halloween, and I had a few that did. I gave the houses a quick coat of black spray paint, then students added ghosts, spider webs, black cats, pumpkins. I had an assortment of cotton balls, those foam sheets, stickers, glitter pens, google eyes, toothpicks, popsicle sticks, and junk from my craft closet for students to use.

Ceramic Snowmen


I did these fabulous snowmen with kindergarten last year. We talked about small, medium, and large, and I had a cute story about snowmen that I can not remember at the moment. Students rolled three balls of clay, one small, one medium, and large. They stacked them and I came by and poked a pencil almost all the way through the three balls of clay. This was to provide an air hole, as well as help the pieces stick together. I also poked holes in the side where sticks could go for arms. I showed them how to make a hat and scarf. I fired these on cone 06 very slow, then I had my assistant help them to glaze the scarves, nose, eyes. She worked with them individually, I realize that most people do not have an assistant so this is not a reality. I only have one for kindergarten. The snowmen took about two months from start to finish, and yes, there were spring blossoms on the trees when they finally took them home, but they are something to enjoy every year.

Tuesday, October 19, 2010

Plaster Masks


I love to make plaster masks. It is a huge mess, but it always ends up being a favorite project. I give the kids the rolls and show them how to cut the strips. I also cover the tables with newspaper, which makes clean up fast. I collect those plastic gallon size buckets and put a few on each table with water. I number the masks from 1-35, then assign each kid a number. I write the number next to the kid's name in my grade book. I show the kids how to apply the plaster. I instruct them to make two layers, one going up and down, then a second going across. It usually takes about 35 minutes for the masks to be finished. We spend about 5 minutes patting the plaster, as it makes the mask smoother. I also have the students work from the inside of the mask, as it is much smoother. I let the masks dry for 24 hours, then they usually pop right out of the molds. The next class students paint the mask with tempera paint. We usually apply two coats to give the mask good color. We spend the last class decorating the mask with sequins, glitter, puff paint, feathers, or whatever I have in the closet. Sometimes I have a theme, and they have to make an animal, or sometimes I just let them make the mask they way they want to. I usually do this with 3rd Grade and up. I do not allow anyone to use the sink, as the plaster could clog the sink. We rinse our hands in a bucket, then they get a wet wipe. It is only after most of the plaster is gone can they wash their hands.

Yearbook Cover


So somehow I am in charge of designing the yearbook cover every year. While it is a fun job, it is also a little stressful, as I am never really sure how it will look until the yearbook goes home with the students. Our school mascots are the vikings and viqueens, and our colors are purple and gold. This is what I came up with this year. I guess I should do my job a little better as most of the kids thought that they were our principal and vice principal, both of whom retired.

Thursday, October 14, 2010

Funny Day in the Art Room

This is really not a post about a lesson, but just a funny thing that happened today. I had a 5th grade class that was glazing ceramics. I have 12 brand new pint sized bottles of glaze. I gave the class a run down of glazing, telling them to be conservative as the glazes are not cheap. Just as I finished my spill, one student picked up a bottle and shook it as hard as he could. What he did not realize was that the top was not on. Glaze flew out all over the student, me, and several others close by. For a full five seconds, everyone just kind of stared at each other as glaze oozed down the wall. Well, what else could I do but laugh. I sent four kids to the office to get clean clothes and a few to the bathroom to wash off. I spent the next hour cleaning glaze from the ceiling, table, floor, chair, and wall. We readjusted about 30 minutes later and got back to work. While the class was not their usual calm, they were ok. The student apologized at least 10 times and offered to buy new glaze. I told him I thought we would be ok, but to be extra careful next time. I guess it is things like this that make me realize that you have to go with the flow sometimes.

I know that student did not mean to fling glaze every I giggled, and the rest of the class was lost.
I was telling the class how the glazes are expensive

Sunday, October 10, 2010

Silly Portraits


I think this might be my most favorite project ever!!! These were done by first and second grade and they are a hoot! I totally copied this from Mrs. Picasso's art blog, so thank you for the wonderful idea. I let the students select the background paper, then the color for the face. We tore the shape of the face out together, then worked from the eyes, ears, nose, mouth, and hair. That took about one hour, with cleanup and line up. We used glue sticks for this part. The next class period, we glued the 9 inch x 12 inch paper to a 12 inch x 18 inch black paper. Then the fun began. I had old bottle tops, pencil erasers, forks, stamps, and other random things that the kids used to stamp. We used black tempera on old plastic lids. I showed them what "going too far" meant, then let them go to town. I had very few students that put too much detail, so really everyone had a great project. The compliments have been nonstop, and I think everyone is proud of their work.